We observed at an early age that youngest daughter had a beautiful voice. Once, as a mere two year old, she was singing happy birthday and her grandmother commented “that kid can carry a tune!” I can barely carry sheet music, let alone a tune so I am curious from what gene pool this talent originated! Regardless, to help nurture her beautiful soprano gift, she has a voice coach – now also a dear friend – who hosts a recital each year. The parents contribute the refreshments for this musical treat and I decided to make Hot Artichoke Dip.
I get emotional each time my daughter performs, very embarrassing for youngest daughter but quite natural for a mom who is routinely overwhelmed with pride! We travel to Italy – Milan and Venice – in three weeks with her high school acapella singing group…you know you will hear more about that later!
Hot Artichoke Dip
From: The Pioneer Woman Cooks
(I borrowed this wonderful book from Foodie and I must return it!)
Ingredients
Two (14 ounce) can artichoke hearts, drained
1 cup mayonnaise
1 block cream cheese
1 cup grated Parmesan cheese
2 green onions, chopped
Cayenne pepper, just a bit to give a little kick
Dash of salt
Pepper to taste
Directions
Preheat oven to 350°. Add one can of the artichokes, the cream cheese and the mayonnaise to the bowl of a food processor (or do in batches in a blender or hand chop).
Sprinkle in cayenne pepper to taste and add the green onions. Pulse the mixture so that it’s mixed but not liquefied. I added two cloves of garlic as well.
Mix in the Parmesan cheese, salt and pepper.
Roughly hand chop the remaining can of artichokes and gently stir into the mixture.
Pour the mixture into an oven-safe dish and bake for 15-20 minutes. Serve with crackers, tortilla chips or vegetables. Slather the leftover dip on sandwiches!
Pages
▼
Sunday, March 27, 2011
Wednesday, March 23, 2011
Mint Chocolate Chip Cookies
No Tuesday night dinners for the next two weeks so I used the time to make an amazing cookie recipe I found on the Betty Crocker website. I could not find crème de menthe baking chips (anyone?) so I doubled the semisweet chocolate chips and added a 1/4 teaspoon more mint extract.
Mint Chocolate Chip Cookies
INGREDIENTS
1 pouch (1 lb 1.5 oz) Betty Crocker® sugar cookie mix
1/2 cup butter or margarine, softened
1/2 teaspoon mint extract
8 drops green food color
1 egg
1 cup creme de menthe baking chips
1 cup semisweet chocolate chunks
Heat oven to 350°F. In large bowl, stir cookie mix, butter, extract, food color and egg until soft dough forms. Stir in chocolate chips.
Using small cookie scoop or teaspoon, drop dough 2 inches apart on ungreased cookie sheet. I used my trusty, well-seasoned pizza stone. I like using stoneware because it bakes more evenly producing a more consistent result.
Bake 8 to 10 minutes or until set. Cool 3 minutes; remove from cookie sheet to wire rack. Serve warm or cool completely. Store tightly covered at room temperature.
These are amazing and so pretty! The house smelled heavenly while they were baking. I’ll include this on my More-or-Less Homemade page since they’re not totally made from scratch.
Monday, March 21, 2011
Spring, Spring, Spring
Oh, the barnyard is busy in a regular tizzy,
And the obvious reason is because of the season
Ma Nature's lyrical, with her yearly miracle
Spring, Spring, Spring.
All the hen-folk are hatchin'
While their men-folk are scrathin'
To ensure the survival of each brand new arrival.
Each nest is twitterin',
They're all baby-sitterin',
Spring, Spring, Spring.
From what musical are these lyrics?
Happy Spring dear readers!
Sunday, March 20, 2011
Beet It!
I think beets are one of those foods you either love or hate….there’s no in between. Personally, I love them (even though my hands look like I participated in some sort of regrettable ritual after cutting them) and welcome creative ways to prepare them. Martha, my idol (we talked about this before), has an absolutely divine chocolate beet cake recipe on her website that I think I will try BUT, will defy the instructions and ice with a cream cheese frosting. There is also beet gnocchi, beet risotto with roasted beets, beet sorbet, or beet soup, otherwise known as borscht, which I have never made but have happily devoured many times. But, today, I explain how to make roasted beets. I found the basic recipe on allrecipes.com and tinkered a bit!
Beets – a stunning vegetable – are a good source of iron and magnesium, are low in calories and fat and high in fiber…in fact, the Romans used beets to treat constipation! Take that Correctol!
Roasted Beets
1 lb of beets (don’t discard those leaves…prepare them as you would spinach or chard)
Olive oil to coat
1 tablespoons orange peel
Salt to taste
Rosemary, Herbs De Provence, or Thyme (or any other herbs whose flavor you’d like to hint)
Peel the beets with a potato peeler and cut into chunks.
Line a medium roasting pan with a piece of foil large enough to fold over the beets. Drizzle the beets with the olive oil.
Sprinkle with the orange peel.
Top with herbs.
Seal the foil tightly and bake at 400° for about 1 hour.
Serve these little beauties on skewers alternating beets and orange slices atop grilled chicken, rice and the beet greens sautéed in olive oil and garlic. Or, simply toss in a field green salad with goat cheese crumbles and walnuts! And, of course, you can serve them as a gorgeous side dish. So easy and delicious. The tanginess of the orange blends so nicely with the sweetness of the beets and the earthiness of the herbs. Yum.
Thursday, March 17, 2011
Corned Beef & Cabbage
So….It was my turn to cook on Tuesday and as an early St. Patrick’s Day treat, I made Corned Beef & Cabbage. When we think Corned Beef & Cabbage we think Irish…right? Well, not exactly. When times were tough in Ireland, beef was considered a delicacy and cows were used mostly as a dairy source. The Irish traditionally enjoyed bacon joint with their cabbage and potatoes and it wasn’t until the mid 1800’s that Irish-Americans, thanks to their new Jewish pals, began to substitute the more readily available corned beef, which is similar in texture to bacon joint.
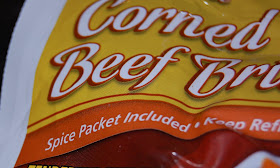
The Corned Beef & Cabbage recipe I used instructed me to “buy a corned beef brisket with the flavor pack included.” What? I had no idea what this meant but figured the smart people at allrecipes.com knew what they were talking about. So I sashayed into Genuardis thinking I would have to spend the better part of an hour looking for a piece of meat sporting a Ramen Noodlesque flavor packet. To my delight, I found an entire case of this salt-brine cured beef, each complete with a spice packet (basically pickling spices...crushed bay leaves, coriander seed, peppercorns, allspice, mustard seed, cloves).
Beef Brisket is prepared like any other tougher cut of meat, by braising – cooked for a long time in liquid – and the result is meat that is melt-in-your-mouth tender. The recipe I used called for cooking the brisket for at least 8 hours in a slow cooker and this produced a most scrumptious result!
Slow Cooker Corned Beef and Cabbage
Allrecipes.com
Ingredients
1 medium onion, cut into wedges
4 medium potatoes, peeled and quartered
1 pound baby carrots
3 cups water
3 garlic cloves, minced
1 bay leaf
2 tablespoons sugar
2 tablespoons cider vinegar
1/2 teaspoon pepper
1 (3 pound) corned beef brisket with spice packet, cut in half
1 small head cabbage, cut into wedges
Directions
Place the onion, potatoes and carrots in a 5-qt. slow cooker. Combine water, garlic, bay leaf, sugar, vinegar, pepper and contents of spice packet; pour over vegetables. Top with brisket and cabbage. Cover and cook on low for 8-9 hours or until meat and vegetables are tender. Remove bay leaf before serving.
Foodie brought some Irish beer and we had an arugula salad served in the lovely traveling salad bowl. For dessert, we had some of my home-made Irish potatoes. A grand evening!
Trivia: Corned Beef & Cabbage was served at what President’s Inaugural Dinner?
Thank you to kitchenproject.com and about.com for the history of CB&C and Google images for the photo of the menu.
Saturday, March 12, 2011
Irish Potatoes
A few Saturdays ago, older daughter and I joined my sister at her LAOH (Ladies Ancient Order of Hibernians) Irish Potato rolling extravaganza. I felt special because I thought this was some sort of secret society and admission was granted only to the most exclusive of lassies. I didn't even need a password...or a fancy hat.
Every year in late February, the ladies of the Order get together and roll, and roll, and roll. They sell their Irish Potatoes by the pound for $5 and all the proceeds benefit local charities. We collectively rolled about 2500 lbs of Irish Potatoes! Shoot!
This particular LAOH hall rivals a Catholic Church with the number of statues that dutifully supervised our activity and we sat by one of the BVM. Herself (as was every inch of the place!) was shrouded in plastic to protect each effigy from becoming saturated with cinnamon and sugar dust! I made sure I didn’t say any bad words, butdamn darn, it was a challenge especially when a runaway potato went meandering across the floor!
We threw those away.
The recipe is a “secret” so no recipe swapping occurred. However, I found a basic recipe and added some of my own ingredients.
Irish Potatoes
1/2 stick butter room temperature.
4 oz of cream cheese room temperature
1 pound confectioners sugar
1/4 cup heavy cream
1 tablespoon Irish whiskey (Paddy, Old Bushmill)
1 teaspoon vanilla
1 ½ cups shredded coconut (shred finer in a blender or food processor)
Cinnamon and some confectioners sugar.
Beat butter and cream cheese. Gradually incorporate one pound confectioners sugar. Add cream, whiskey, vanilla and beat until incorporated. Fold coconut in by hand. Refrigerate for several hours then shape into 1” balls (the confectioners sugar will make this step less sticky) and roll in the cinnamon…and there you have them, Irish Potatoes. These are good, but those made by the lovely ladies of the LAOH are better!
At Easter, you can omit the whisky (or not), add a wee bit more vanilla and dip in chocolate for home-made Easter eggs!
Thank you for a great day...we had a blast!
Every year in late February, the ladies of the Order get together and roll, and roll, and roll. They sell their Irish Potatoes by the pound for $5 and all the proceeds benefit local charities. We collectively rolled about 2500 lbs of Irish Potatoes! Shoot!
This particular LAOH hall rivals a Catholic Church with the number of statues that dutifully supervised our activity and we sat by one of the BVM. Herself (as was every inch of the place!) was shrouded in plastic to protect each effigy from becoming saturated with cinnamon and sugar dust! I made sure I didn’t say any bad words, but
We threw those away.
The recipe is a “secret” so no recipe swapping occurred. However, I found a basic recipe and added some of my own ingredients.
Irish Potatoes
1/2 stick butter room temperature.
4 oz of cream cheese room temperature
1 pound confectioners sugar
1/4 cup heavy cream
1 tablespoon Irish whiskey (Paddy, Old Bushmill)
1 teaspoon vanilla
1 ½ cups shredded coconut (shred finer in a blender or food processor)
Cinnamon and some confectioners sugar.
Beat butter and cream cheese. Gradually incorporate one pound confectioners sugar. Add cream, whiskey, vanilla and beat until incorporated. Fold coconut in by hand. Refrigerate for several hours then shape into 1” balls (the confectioners sugar will make this step less sticky) and roll in the cinnamon…and there you have them, Irish Potatoes. These are good, but those made by the lovely ladies of the LAOH are better!
At Easter, you can omit the whisky (or not), add a wee bit more vanilla and dip in chocolate for home-made Easter eggs!
Thank you for a great day...we had a blast!
Thursday, March 10, 2011
Striped Ravioli
Well this Tuesday night thing is getting very interesting (and competitive)! We had dinner at the Architect’s house on Tuesday night and she made Striped Ravioli with Truffle Ricotta filing. Shoot…I better get cracking because next Tuesday is my turn!
The striped ravioli is achieved by making a batch of regular pasta and passing the dough through the pasta machine into long ribbons, then making a batch of flavored pasta (beet, spinach, saffron, basil, butternut squash, etc….), cutting that batch of dough into linguine, pressing the linguine into the plain pasta ribbons, then passing the newly adorned pasta ribbons through the pasta machine one more time. Phew – I get exhausted just writing about it! It was quite fun but a lot of work. So here’s what you do.
First, you need all the necessary accouterments…a pasta machine, a dough cutter, and a ravioli press. Architect got her stuff from Fante's on 9th Street in Philadelphia.
Then, make the filling by mixing together two cups of ricotta cheese, ½ cup Parmesan cheese, two eggs and 2 teaspoons of truffle oil. Cover and place in the refrigerator until ready to use.
To make the plain pasta dough, make a well in the middle of three cups of flour and add three eggs and a little salt. Using a fork, gradually incorporate the eggs into the flour (not all of it) from the middle working your way out. When pliable, knead the dough until it is a bit elastic and somewhat shiny and bounces back easily when poked.
Wrap the dough in plastic and let it rest for 15 minutes. My grandmom used to put the dough in a bowl and cover it with a towel…both methods keep it from drying out.
While the plain dough is resting, make the flavored dough using the same method but only add two whole eggs, one egg yoke and a ½ cup of pureed vegetables or herbs…we used beets. Wrap that dough up and let it rest for at least 15 minutes.
Cut off ¼ of the plain dough, sprinkle it with flour and run it through the pasta machine on gradually thinner settings several times. When running the dough through on the thicker settings, fold it onto itself into three times before running it through the pasta machine each time. You won’t need to do this as the dough gets thinner.
When the dough is “linguine” thin, sprinkle the ribbons with flour and set aside.
By the time you are done with the plain dough, the flavored dough will be rested and ready to run through the pasta machine. Use the same method ONLY the final pass through on the pasta machine will be on the linguine setting. Lightly brush the plain pasta ribbon with water then press the linguine strips into the plain dough...
...and run through the pasta machine to fully incorporate the stripes into the plain dough.
Place the striped dough into the ravioli mold and fill with a teaspoon of the ricotta mixture…
…place another ribbon of the striped dough on top of the ravioli mold and roll over with a rolling pin.
This will both cut and shape the ravioli.
Boil in salted water until the ravioli floats to the top. Poke a tiny pin hole in in the top of each ravioli to prevent them from bursting when boiling.
Serve with your favorite sauce. Architect made a simple sage olive oil sauce so that the flavor of the ricotta truffle mixture emerged nicely. We also had a delicious Caesar salad in the lovely traveling salad bowl. A fantastic – and educational – evening.
Architect got this striped ravioli idea from one of her recipe books and I will update this post with the name of the book (forgot to jot it down!).
Saturday, March 5, 2011
Don't Be So Chintzy!
I collect chintz ware china. When I say “collect,” I use this term loosely because my small but cherished compilation pales in comparison to other collectors of these brilliant bouquets of ceramic. Most of my pieces are from the 30-40's and made by one of the popular manufacturers in England at the time – Royal Winton, James Kent, Shelley, Lord Nelson. Some pieces are new, but the new pieces aren’t nearly as lovely as their antique counterparts. Chintz ware china is very colorful and when displayed together with their different yet complementary companions, one is immediately transported into a lovely British garden reminiscent of those described in any Jane Austen novel....my favorite – Pride and Prejudice and its feisty heroine, Elizabeth Bennet.
An English garden is a confluence of floral color, width, and height and chintz ware borrows from this theme beautifully. Chintz dinnerware, teaware, and ornamental pieces are covered with a dense pattern, mainly flowers, applied by a lithograph transfer printing process rather than painting each piece by hand. However, during WWII practicality prevailed and manufacturing anything garish or gratuitous was forbidden --- even the queen’s wedding dress was a bit more understated than it may have otherwise been! However, in the 1990’s, due to a renewed interest in collecting chintz ware and with advances in the transfer production process, potteries once again began reproducing the patterned pottery, but as I said, although beautiful, there is nothing like the look and feel of an original piece.
You may have seen some of my pieces in previous posts... I love to use them but hold my breath when doing so and am always very careful when washing them and putting the pieces away. My two favorites are teacups – both from Royal Winton…. a beautiful fruited pattern called Evesham and an equally beautiful floral pattern called Sweet Pea.
Anyway, a few photos of my collection that I hope you will enjoy and find as exquisite as I do.
Wednesday, March 2, 2011
Homemade Gnocchi
We had dinner at Foodie’s house on Tuesday and she made homemade gnocchi with caramelized onions and bacon.
Making gnocchi may seem intimidating but it is a relatively simple process…and the result – fresh pasta – is totally worth the extra time. I usually just snip a bag open but perhaps now that I can’t proffer the “I don’t know how excuse” my scissors will have to take a hiatus.
Foodie used the basic gnocchi recipe from the Silver Spoon cookbook. I am excited about the flavor possibilities now that I am enlightened about the gnocchi-making process so please comment if you have some favorites that you’d like to submit to my project! There is a pumpkin gnocchi recipe in the book that I am eager to try.
Basic Potato Gnocchi
2 1/2 lbs of Russet Potatoes (they are starchier and hold together nicely)
1 egg, beaten
1 ¾ cups of flour
Salt to taste
Steam unpeeled, whole potatoes until soft – this will keep moisture from getting into the potato which help the gnocchi to hold together.
When cool enough to handle, remove the skins...
Run each potato through a ricer or food mill.
Make a “well” in the middle of the riced potatoes and pour the beaten egg into the center. Begin to (gingerly) incorporate the potatoes into the egg working from the middle out.
Gradually sprinkle in the flour and salt and knead into a soft, elastic dough – do not over knead.
Break the dough into quartered sections. Roll each section into a long, round strip...
...then cut the strip into 1” pieces. Roll each 1” piece along a fork to form the classic gnocchi pattern and place each on a floured cookie sheet until ready to cook. Boil the gnocchi in salted water until they float to the top. Drain and serve with your favorite sauce. Foodie caramelized onions in bacon fat with a dash of sugar and herbs de provence. Then she added a few cloves of garlic and finished the sauce with a dollop of cream, crisp bacon pieces and fresh chives.
We also had a field green salad with roasted beets, goat cheese and walnuts in the lovely traveling salad bowl and homemade (by Foodie) blood orange sorbet. I will post a very easy roasted beet recipe this weekend…fabulous!